
To manage database changes in Laravel applications, Laravel migration is essential. They provide an organized strategy for coordinating the codebase of your application and database across different settings.
Additionally, envision your application changing over time, necessitating the installation of additional tables or modifications to the database structure. However, Laravel creates migration saves this procedure from turning into a laborious, error-prone manual operation.
A detailed history of modifications made in the order they were generated is ensured by timestamped migration files. However, this makes things easier, such as implementing changes gradually or going back to former states.
Migrations provide a more dependable and tidy method of managing database modifications. Moreover, they enable you to specify modifications in a methodical, repeatable, and error-proof way. Your database structure will remain consistent across all settings thanks to well-written migration scripts, which eliminate the need for manual intervention.
Keep reading and exploring to learn what are migrations in Laravel and how to create Laravel default date value migration.

Table of Contents
What Are Migrations in Laravel?
The Laravel Migration set of instructions outlines the changes you want to apply to your database schema. However, these changes could call for establishing new tables, editing already-existing ones, seeding the database with initial data, or adding or modifying columns.
Regardless of whether you’re using PostgreSQL and MySQL, SQLite, or any Laravel-supported database system, you can do Laravel create migration without worrying about it. Migrations are portable and adaptable to other database systems because the framework abstracts away the syntax unique to each database.
However, there is an up method for defining the modifications and a down method for undoing them in every migration file. The database schema is updated to the most recent version when you execute PHP artisan make: controller resource model and migration, which applies all outstanding migrations.
Laravel 11 has added several enhancements to the framework as a whole, such as:
- The application structure has been simplified for improved organization.
- Rate limitation per second for more accurate processing of API requests.
- A new health routing directive that automatically provides a basic health-check destination.
- For better safety, use a graceful encryption key rotation.
- Enhancements to queue testing to facilitate task testing.
- Automate routine chores using new Artisan commands.
- For real-time applications, Laravel Reverb is an integrated WebSocket server.
What Are The Benefits of Laravel Migration?
Because of its many advantages, Laravel migration is an essential component of every serious Laravel project. Let’s dissect these benefits:
Database Version Control
Your database’s migrations act as a version control system, preserving consistency across development, classification, and production environments. A common database schema makes it possible for all developers working on a project to apply the same changes without having to manually communicate with one another.
Also Read: Laravel Best Security Practices: An Overview
Simpler Retractions
Reverting database schema changes is made easier with Laravel. Moreover, you may simply roll back a Laravel migration if it produces a mistake or unanticipated problems, which is crucial flexibility for keeping a reliable and clean database.
Uniformity Throughout Environments
You can keep your local, staging, and manufacturing databases in sync by using PHP artisan make migration. However, by using the same migration scripts, you can easily duplicate the exact schema in each environment, reducing discrepancies and errors.
Manual SQL is Not Necessary
Writing intricate and prone to errors SQL queries is no longer necessary, thanks to Laravel database select type Laravel migrations, which enable you to specify database structure changes using a clear and expressive vocabulary. Moreover, check out Temok’s one of the best and most affordable Managed Laravel Cloud Hosting plans in 2025!
Consistency Of The Codebase
You can make sure that all project developers can implement database changes consistently across all settings, from local development configurations to production servers, by encapsulating them in a create migration in Laravel files.
Management Of Dependencies
Managing intricate database modifications that depend on the presence of specific structures becomes easier with the dependency management function.
Facilitating Collaboration
Teams can monitor and communicate database changes to all team members because of Laravel migration. Moreover, it guarantees that all developers use the same schema by enabling fresh Laravel create database migration to be downloaded from a common source.
How To Create a Migration in Laravel?

Controlling your database security schema changes requires creating a migration in Laravel. To have a better understanding of its structure, let’s create a small Laravel database migration.
Create a Migration
The PHP artisan make migration command in Laravel is used to construct a Laravel migration. Go to the directory of your Laravel project by opening your terminal. Next, execute the subsequent command:
php artisan make:controller --resource --model=ModelName --migrationA new migration file with the name 2024_09_18_000000_create_example_table.php will be created in the database/migrations directory as a result of this command. Migrations are carried out in the order in which they were made, thanks to the timestamp in the filename.

Describe The Schema
Use a code editor or your preferred command-line text editor to open the freshly produced migration file. The migration file has two methods: up and down. The down technique outlines how to undo the Laravel migration you wish to make to your database schema, whereas the up method outlines the changes you wish to make.
The following is a representation of a straightforward Laravel create database migration that generates a table named example with two columns:
use Illuminate\Database\Migrations\Migration;

use Illuminate\Database\Schema\Blueprint;

use Illuminate\Support\Facades\Schema;


Class CreateExampleTable extends migration

{

public function up()

{

Schema::create('example', function (Blueprint $table) {

$table->bigIncrements('id');

$table->string('name');

$table->text('description')->nullable();

$table->timestamps();

});

}

public function down()

{

Schema::dropIfExists('example');

}

}
Including Columns In The Table
To generate a new migration file that adds a new column to the sample table, use the following command:
PHP artisan make migration add_new_column_to_example_table --table=exampleMaking changes to the migration file:
Change the up and down methods as follows after opening the freshly generated migration file (2024_09_18_45678_add_new_column_to_example_table.php, for example):
use Illuminate\Database\Migrations\Migration;

use Illuminate\Database\Schema\Blueprint;

use Illuminate\Support\Facades\Schema;

class AddNewColumnToExampleTable extends migration

{

public function up()

{

Schema::table('example', function (Blueprint $table) {

$table->string('new_column')->nullable();

});

}

public function down()

{

Schema::table('example', function (Blueprint $table) {

$table->dropColumn('new_column');

});

}

}
4. Executing the Migration
Use the following Artisan command to apply the Laravel migration and generate the sample table in your database:
PHP Artisan MigrationAll pending migrations are carried out using this command. In your database’s migrations table, Laravel records which migrations were earlier performed.

Additional Laravel Migration Commands
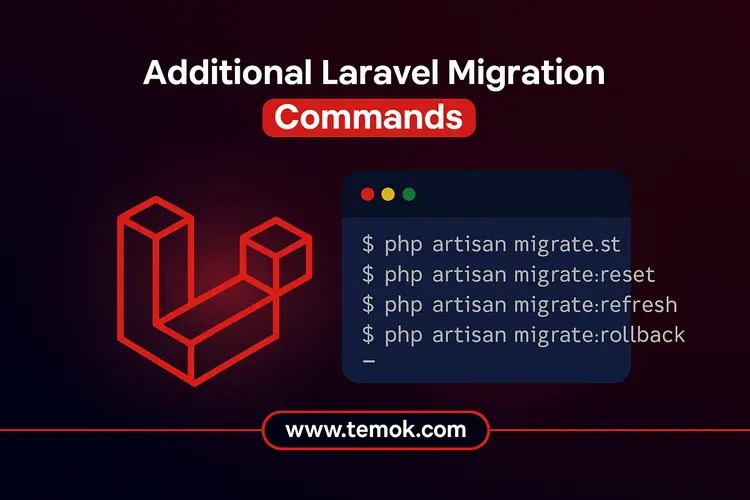
Adding, altering, or deleting database indexes may be accomplished with Laravel migrations. Let’s examine each of these steps step-by-step.
Including in the index:
use Illuminate\Database\Schema\Blueprint;

use Illuminate\Support\Facades\Schema;

Schema::table('users', function (Blueprint $table) {

$table->index('email');

}
Renaming Index:
To change the name of an index, use
renameIndex():

$table->renameIndex('email', 'mobile_no');

}
Eliminating The Index
To remove an index, you can utilize
dropIndex():

$table->dropIndex('email');

}
Applying Constraints for Foreign Keys
Foreign key constraints, which guarantee that the data in your database remains consistent and adheres to the connections between various tables, may be created using Laravel.
{$table->foreignId('id')

constrained('users')

cascadeOnUpdate()

cascadeOnDelete();}
Laravel Migration Best Practices For Smooth Database Changes

Database schema changes can be efficiently managed using Laravel migrations, but there are certain recommended practices to follow. These crucial pointers will help you maintain production-ready, clean, and managed migrations and improve Laravel performance optimization.
Make Migrations Easy
Making several little migrations is preferable to making one big one. This method makes it simpler to track and identify problems as they occur. A single, logical Laravel create migration, such as adding a column or establishing a table, should be made during each transfer.
Write Down The Modifications
Writing out the necessary adjustments is generally a smart idea before you begin scripting your migration. Moreover, this will lower the likelihood of mistakes by helping you define exactly what has to be done. Having a documented strategy can ensure that your Laravel migration is accurate, whether you’re adding columns, changing relationships, or establishing new tables.
For example, if you want to add a new column called “contact” to the “users” table, you should write:
Table: users

Add the contact column (integer, nullable).
Additionally, you can ensure that your migration meets the requirements of your application and avoid team misunderstandings by clearly communicating the changes.
Employ Evocative Names
Give each migration file a clear and descriptive name so that it is apparent what it accomplishes. To specify the precise operation, for example, use names like create_users_table or add_email_to_users_table.
Also Read: Server Migration Process With Useful Tips And Important Checklists
Utilize Version Control
When working with migrations, using Git or another version control system is necessary. Additionally, migrations should have a commitment to the code for your application as you track your codebase. However, version control provides several important advantages:
- Working together ensures that everyone in the team adheres to the same template.
- If necessary, reversibility enables you to undo code and migrations.
- You can keep track of who made modifications to the database and when they were made due to traceability.
Version control ensures seamless database migrations across various environments and team members in large projects. However, you should handle each Laravel migration as a crucial component of the architecture of your program.
Local Test Migrations
Run migrations locally on a new database before putting changes into production to make sure everything goes as planned. However, by testing migrations, you may prevent surprises on live databases and identify any issues. It will also help to host Laravel website or app.
Make A Backup Of Your Production Database
Make a database backup before doing any migrations in production. In the event that something goes wrong during the migration, this precaution reduces the chance of data loss.
However, you may handle a Laravel migration using a dependable method that reduces risks by utilizing unambiguous naming and backing up production databases.
Evaluate Every Migration
Before implementing any move to a production environment, testing is crucial. However, this is made simple by Laravel, which enables you to use PHP Artisan migration to do migrations in local or staging environments. You may safely deploy the migration to production after you’ve verified that everything functions as it should.
Conclusion
Handling changes to database schemas reliably and efficiently is one of the advantages of a Laravel migration. Thanks to the version control system offered by Laravel database select type migrations and approved methods, your databases will be consistent, easily configurable, and able to be rolled back if necessary.
Together, these advantages improve the development process, increasing its dependability and efficiency while also enhancing the maintainability of Laravel applications. Moreover, you can make sure that your migrations are dependable, effective, and well-documented by adhering to best practices and techniques. We hope you now understand how to create migration in Laravel.
FAQs (Frequently Asked Questions)
What Is Laravel Migration?
The modifications you wish to make to your database schema are outlined in the Laravel Migration set of instructions. However, these adjustments may involve adding or changing columns, seeding the database with beginning data, editing already-existing tables, or establishing new tables.
What Is The Best Practice For Laravel Migration?
Schema migrations should only be used for structural modifications. To manage data migrations, use Laravel’s artisan commands. Moreover, this division offers freedom in data modification while maintaining the cleanliness and focus of your migrations.
How To Migrate PHP to Laravel?
The first steps in the phased process of migrating a PHP application to Laravel are establishing Laravel, moving the database, and then gradually reviewing the key features and code. However, understanding the fundamental processes and utilizing Laravel’s built-in features can help one to simplify this approach.
How To Migrate Laravel To Another Server?
- Add the files for the Laravel project to your account. Moreover, you can do it via SFTP or the cPanel File Manager.
- Moreover, use SSH to access your account.
- Additionally, use your favorite text editor to open the index.php file located in the public_html directory.
- Lastly, save the index with your modifications.