

A website may run flawlessly on one device but suddenly refuse to load on another. Sometimes the problem is not with your internet connection at all. Your device may just be utilizing an out-of-date DNS result. Before altering complex network settings, knowing how to clear DNS Cache provides a basic troubleshooting step.
To avoid repeating the same searches, computers and web browsers temporarily cache DNS lookup data. This usually speeds up browsing. However, an outdated cached result may occasionally cause issues when a website modifies its servers, IP addresses, or DNS data.
This guide will show you how to flush DNS cache on Windows, macOS, Linux, Chrome, Firefox, and other popular environments. It also describes what to do if flushing DNS does not resolve the issue.
Key Takeaways
- Clearing the DNS cache deletes locally cached DNS resolution information and allows for new lookups.
- The procedure varies between Windows, macOS, and Linux since each operating system may employ various resolver services.
- Browsers can save their own DNS or network state; therefore, deleting the operating system cache may not always be enough.
- Flushing DNS can improve certain stale-resolution issues, but it cannot fix faulty authoritative DNS entries.
- If the problem persists, check DNS configuration, DNS resolver behavior, network settings, VPNs, firewalls, and the domain itself.
What is a DNS Cache?
A DNS cache refers to a temporary storage location that retains recent DNS lookup results, such as the IP address linked to a domain name. It allows your device to load websites faster by eliminating several calls to a DNS server.
The Domain Name System translates a human-readable domain name into an IP address, which computers may use to connect to a server.
For example, when you type in a website URL, your device does a DNS server query to determine where the domain should connect.
A simplified procedure looks like this:
Domain Name → DNS Lookup → IP Address → Cached Results
A DNS resolver can temporarily cache the response so that the following request does not have to begin from scratch. Therefore, you must know how to clear DNS Cache.
The amount of time a DNS response may be cached is determined by its TTL, or time to live. A lower TTL provides for faster detection of changes, but a longer TTL might minimize the number of DNS requests required.
Your local DNS cache exists for practical reasons. It saves time by avoiding unnecessary requests to a DNS server or recursive resolver.
Why Should You Clear Your DNS Cache?
Learning how to clear DNS Cache is very beneficial for websites that have just relocated to a new server or modified their DNS setup.
Flush DNS when you encounter resolution problems that might be caused by stale cached data. Useful scenarios include:
- A website has lately changed its IP address or server.
- You have modified DNS records (such as an A record, AAAA record, or CNAME) and wish to view the new version instantly.
- A domain resolves poorly on one device but works well on others.
- You are experiencing a DNS_PROBE_FINISHED_NXDOMAIN or NXDOMAIN error in your web browser.
- A website launched yesterday but now displays a connection issue with no evident explanation.
Flushing is a troubleshooting step. It does not speed up your connection, repair a misconfigured nameserver, or rectify issues with the authoritative DNS records themselves. If the DNS entries at the source are incorrect, deleting your local cache will not help. Moreover, it is best seen as a simple diagnostic step in larger network troubleshooting.
Also Read: How To Fix DNS Server Not Responding: Step by Step Guide To Fix
How To Clear DNS Cache on Windows?
Windows 10 & Windows 11 make it easy to remove the local DNS resolver cache.
The most common command is ipconfig flushdns. Microsoft also provides documentation on the PowerShell Clear-DnsClientCache cmdlet as an alternative method of clearing the DNS client cache. Here are both methods to know how to clear DNS Cache:
Using Command Prompt
To clear DNS cache Windows, users may follow these procedures on supported versions:
- Open the Start menu
- Search for Windows Command Prompt
- Right-click Command Prompt and pick the proper administrator option, if prompted.
- Enter the following command:
ipconfig /flushdns

- Press Enter
- Look for a confirmation message
- Reopen the affected website
The ipconfig /flushdns command is the typical Windows technique for flushing DNS that users frequently use during DNS issues. Microsoft suggests it as a DNS cache troubleshooting procedure.
This procedure works for both clear DNS cache Windows 10 and clear DNS cache Windows 11 troubleshooting.
Using PowerShell
You may also use PowerShell instead of Command Prompt. Apply the following procedure for DNS cache clears:
- Press Windows + S and type PowerShell.
- Now, right-click Windows PowerShell and choose Run as Administrator.
- Enter this command, then hit Enter:
Clear-DnsClientCache
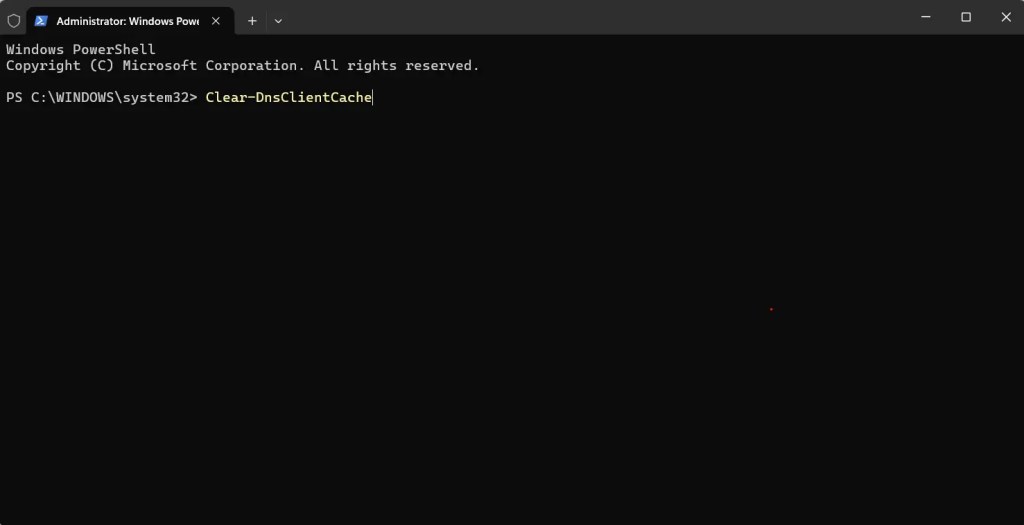
- No output message indicates that it ran correctly.
- Test the domain again to validate.
After flushing, your system will conduct a new DNS resolution for each domain on the next lookup. Browsing may seem somewhat slower for the first few queries as the cache rebuilds.
If the situation persists, avoid frequently flushing DNS. Proceed to the next diagnostic step instead.
Let’s now discuss how to clear DNS Cache on macOS.
How To Clear DNS Cache on macOS?
The technique for Mac users to clear DNS cache Mac varies depending on the macOS versions and DNS providers.
Terminal is the most practical way to debug on current macOS. A common command sequence is:
- Open Terminal (Applications → Utilities → Terminal).
- Enter the following command, then press Enter:
sudo dscacheutil -flushcache; sudo killall -HUP mDNSResponder

- Enter your administrator password when asked.
- There is no confirmation message on success.
- Retry the website or perform nslookup to check.
macOS DNS flush commands by version:
| macOS Version | Command |
|---|---|
| Sequoia / Sonoma / Ventura (current) | sudo dscacheutil -flushcache; sudo killall -HUP mDNSResponder |
| Monterey / Big Sur / Catalina | sudo dscacheutil -flushcache; sudo killall -HUP mDNSResponder |
| High Sierra / Sierra | sudo killall -HUP mDNSResponder |
For customers looking for macOS clear DNS cache, the key point is to use a command relevant for the installed macOS version rather than copying a decade-old command from an unverified guide.
On macOS, the mDNSResponder process conducts DNS resolver duties. The killall -HUP option instructs the service to refresh its cache rather than restarting altogether. With this, you can clear DNS cache macOS easily. Moreover, now you know how to flush DNS Mac.
Therefore, we will now discuss how to clear DNS Cache on Linux OS.
How To Clear DNS Cache on Linux?

Because various Linux distributions utilize different DNS resolvers and caching services, Clear DNS cache Linux is more complicated than on Windows or Mac. The correct command is largely dependent on the service that your system utilizes. Your system might utilize systemd-resolved, NetworkManager, dnsmasq, BIND, or another resolver configuration.
Here’s how you can flush DNS Linux:
1. Using systemd-resolved
On systems that use systemd-resolved, you may normally use:
sudo resolvectl flush-caches
This clears the cache of the systemd resolver service.
Before performing resolver-specific instructions, ensure that the service is operational.
Verify it worked with:
resolvectl statistics
2. Using NetworkManager
NetworkManager is compatible with several DNS processing setups, including systemd-resolved and dnsmasq. The documentation verifies that they can do local caching.
On systems using NetworkManager as the DNS management layer:
sudo nmcli general reload dns-full
This reloads DNS configuration and clears the relevant cache state
If your distribution utilizes NetworkManager, restarting the relevant network service may restore its DNS state; nevertheless, you should not restart services blindly on a production computer.
Also Read: ERR_CACHE_MISS: Smart Fixes To Quickly Restore Website Access
3. Using dnsmasq
If your system runs dnsmasq, the right cache action is determined by how it is configured. So, you must know how to clear DNS Cache using dnsmasq command.
For example, if your system uses dnsmasq as a local caching resolver, use the following command:
sudo systemctl restart dnsmasq
When administering the system, you can restart the dnsmasq service, but you should use the service manager and configuration that is appropriate for your distribution.
4. Using BIND/named
A server that uses BIND as a caching resolver has its own cache management procedure.
Administrators typically handle BIND via rndc rather than a desktop DNS flush command.
On systems running BIND as a recursive DNS resolver, use the following command:
sudo rndc flush
This clears the BIND resolver cache without restarting the service. Do not instruct every Linux user to run the systemd-resolved, NetworkManager, dnsmasq, and BIND commands. Determine which resolver is currently handling DNS on the computer.
How To Clear DNS Cache in Your Browser?
The operating system cache is not always the only source of DNS or network information.
A web browser may save its own state; thus, users looking to clear DNS cache Chrome may need to take an extra step. Here are some examples of web browsers from which you can clear browser DNS cache:
1. Google Chrome
Clear DNS cache Chrome using the built-in net-internals tool:
- In the address bar, type chrome://net-internals/#dns
- Click Clear host cache.

- Then navigate to chrome://net-internals/#sockets
- Click to flush socket pools.

- Reload this page.
If the page still won’t load, restarting Chrome can help guarantee that the browser begins with a clean network state.
Remember that Chrome’s browser cache differs from the operating system’s DNS cache. Clearing pictures and other browsing data does not necessarily indicate that you have cleared all DNS-related states.
Let’s discuss how to clear DNS Cache on Microsoft Edge browser.
2. Microsoft Edge
Edge runs the same Chromium engine as Chrome. The method is the same.
- Enter the following DNS cache command: edge://net-internals/#dns
- Click Clear host cache.

- Then, use edge://net-internals/#sockets to flush socket pools.

If a browser-specific DNS issue arises, restart Edge and examine its current internal networking tools rather than following advice published for an older browser version.
3. Mozilla Firefox
Firefox handles DNS somewhat differently. To clear the network state:
- Go to Settings → Privacy and Security
- Under Cookies and Site Data, click Clear Data
- Check Cached Web Content and then click Clear

- Alternatively, restart Firefox to clear the in-memory DNS status
To debug, Mozilla has provided the about:networking#dns interface for examining DNS cache information.

If you need to remove the whole Firefox cache, Mozilla’s current instructions are accessible under the Privacy & Security settings.
4. Safari
Safari relies heavily on macOS networking services to resolve DNS queries.
There is no need to create a separate Safari-specific DNS flush command. If Safari is displaying a DNS error, then clear the macOS DNS state before looking into the network or DNS settings.
How To Check If the DNS Cache Was Cleared?
After flushing, double-check the results before declaring the problem fixed to properly know how to clear DNS Cache.
Reload the affected website—the simplest basic check. If the page now loads properly, the issue was with the cached data.
Use nslookup to do a straight DNS query:
nslookup example.com
This searches the specified DNS server and returns the domain’s current IP address.
Use dig on Linux or macOS.
Dig example.com
Dig returns more specific information, including the TTL, the DNS resolver that answered, and the whole A or AAAA record received.
Compare the outcome with the projected records. The cache is serving new information if the comeback IP address corresponds with the planned destination of the domain. DNS propagation may still be in progress, or the authoritative DNS level might be the source of the issue if it still shows the previous address.
Flushing the local DNS cache successfully does not imply that the domain’s entries are valid. It merely guarantees that your device will conduct a new lookup.
What If Clearing the DNS Cache Doesn’t Fix the Problem?
If the problem persists after you’ve performed a DNS cache flush, it’s not in your local cache. Investigate these areas next to properly understand how to clear DNS Cache:
- Check the domain’s DNS records. Use nslookup or dig to ensure that the A record, AAAA record, and CNAME are pointing to the right location. If they are incorrect at the source, no local cache flush will correct them.
- Check the DNS propagation and TTL. If you lately changed a DNS record, recursive resolver servers everywhere, rather than only your device, may still have cached the previous value. The DNS propagation timing is set by the changed record’s past TTL. Use an internet propagation checker to find out which resolvers all across the globe are returning.
- Try another DNS resolver. Set your device to temporarily use an alternative DNS server, such as 8.8.8.8 (Google) or 1.1.1.1 (Cloudflare). If the domain resolves successfully using another resolver, the issue might be with your default DNS resolver rather than your local cache.
- Restart your network connection or device. A new network connection can reset the resolver state and rule out temporary difficulties.
- Check your firewall, VPN, and security software. Some security programs intercept DNS lookup queries, resulting in resolution failures that resemble cache issues.
- Check the browser and network settings. Confirm that no custom DNS records or manual host file entries are overriding resolution.
Does Clearing DNS Cache Fix DNS_PROBE_FINISHED_NXDOMAIN?
The error DNS_PROBE_FINISHED_NXDOMAIN indicates that the DNS lookup did not return an existing domain in the anticipated manner.
Clearing the local DNS cache might be beneficial when stale local information is contributing to the problem.
However, NXDOMAIN can also occur when the domain does not exist, the DNS setup is misconfigured, the wrong resolver is queried, or authoritative DNS information is unavailable.
Therefore, knowing how to clear DNS Cache or flushing DNS Cache is simply one diagnostic step.
If you observe DNS_PROBE_FINISHED_NXDOMAIN, rather than emptying the cache frequently, look into the domain, DNS records, resolver, and authoritative setup.
For a complete guide to diagnosing and fixing this specific error, see our guide: DNS PROBE FINISHED NXDOMAIN: What It Means And How To Fix It.
FAQs (Frequently Asked Questions)
Is It Good to Clear DNS Cache?
Yes, clearing (or flushing) your DNS cache is a perfectly safe and useful routine maintenance procedure with no bad consequences.
How Do I Clear The DNS Cache in Chrome?
Open Chrome and navigate to chrome://net-internals/#dns, then select Clear host cache when that option appears. Next, restart Chrome and test the website again.
How Can I Clear My DNS History?
The local DNS cache retains the resolution history for recently visited domains.
- To clear it in Windows, run ipconfig /flushdns in the Command Prompt.
- On macOS, execute the Terminal command: sudo dscacheutil -flushcache; sudo killall -HUP mDNSResponder.
- On Linux, run the relevant command for your resolver service (systemd-resolved, dnsmasq, etc.). This clears just locally cached DNS info, not your browser history or network logs.
Does Flush DNS Delete History?
No. The DNS cache flush procedure removes cached DNS resolution data. It does not remove your browsing history, downloaded files, cookies, bookmarks, or account information.
Conclusion
Knowing how to clear DNS Cache is a valuable ability for anybody who administers websites, domains, or internet connections.
While PowerShell offers Clear-DnsClient Cache, the simplest approach on Windows is ipconfig /flushdns. Browsers may keep more network data, while macOS and Linux need instructions particular to their resolver systems.
The most crucial idea is to see DNS flushing as a debugging procedure rather than a magic fix button.
If a new query still yields the incorrect result, check the DNS records, TTL, resolver, nameserver delegation, network setup, VPN, firewall, and authoritative DNS.
Instead of constantly repeating the same cache-clearing command, this method saves time and helps you identify the root cause.